


The cold butter in your refrigerator might be the worst thing you can put on a fresh kitchen burn. It's a common mistake, but trapping heat against your skin with oils or heavy creams actually deepens the injury. When a hot pan slips or steam hits your wrist, the pain is sharp and the fear of a permanent scar is real. You want relief that works immediately so you can get back to your meal. Effective burn care for home chefs requires a shift from old myths to professional, moisture-retaining standards that neutralize heat on contact.
You can master the same protocols used in commercial kitchens to stop pain instantly and prevent blisters without leaving your stove. This guide provides the most current 2026 relief and healing standards, focusing on the science of hydrogel technology to shield your skin and accelerate recovery. We'll show you how to identify the severity of a burn, why running water isn't always enough, and the exact steps to ensure your hands stay smooth and scar-free. From specialized first aid kits to doctor-recommended cooling sprays, you're about to transform your kitchen safety routine into a professional-grade recovery system.
Key Takeaways
- Understand the critical differences between thermal contact and liquid scalds to choose the most effective intervention for your specific injury.
- Stop using ice and butter. Learn why these traditional methods increase infection risk and actually deepen tissue damage.
- Master professional burn care for home chefs by using hydrogel technology to pull heat from deep tissue and stop pain on contact.
- Build a dedicated 2026 kitchen emergency station with specialized sprays and dressings that allow you to recover without leaving your stove.
The Heat of the Kitchen: Common Burns Home Chefs Face
Kitchens are high-stakes environments where injuries happen in milliseconds. One slip with a heavy pan can lead to weeks of recovery. Understanding the specific nature of these injuries is the first step in effective burn care for home chefs. Whether it's the searing heat of a cast iron pan or the invisible threat of a vapor cloud, each burn type requires a tailored response to protect your skin and stop the progression of the injury.
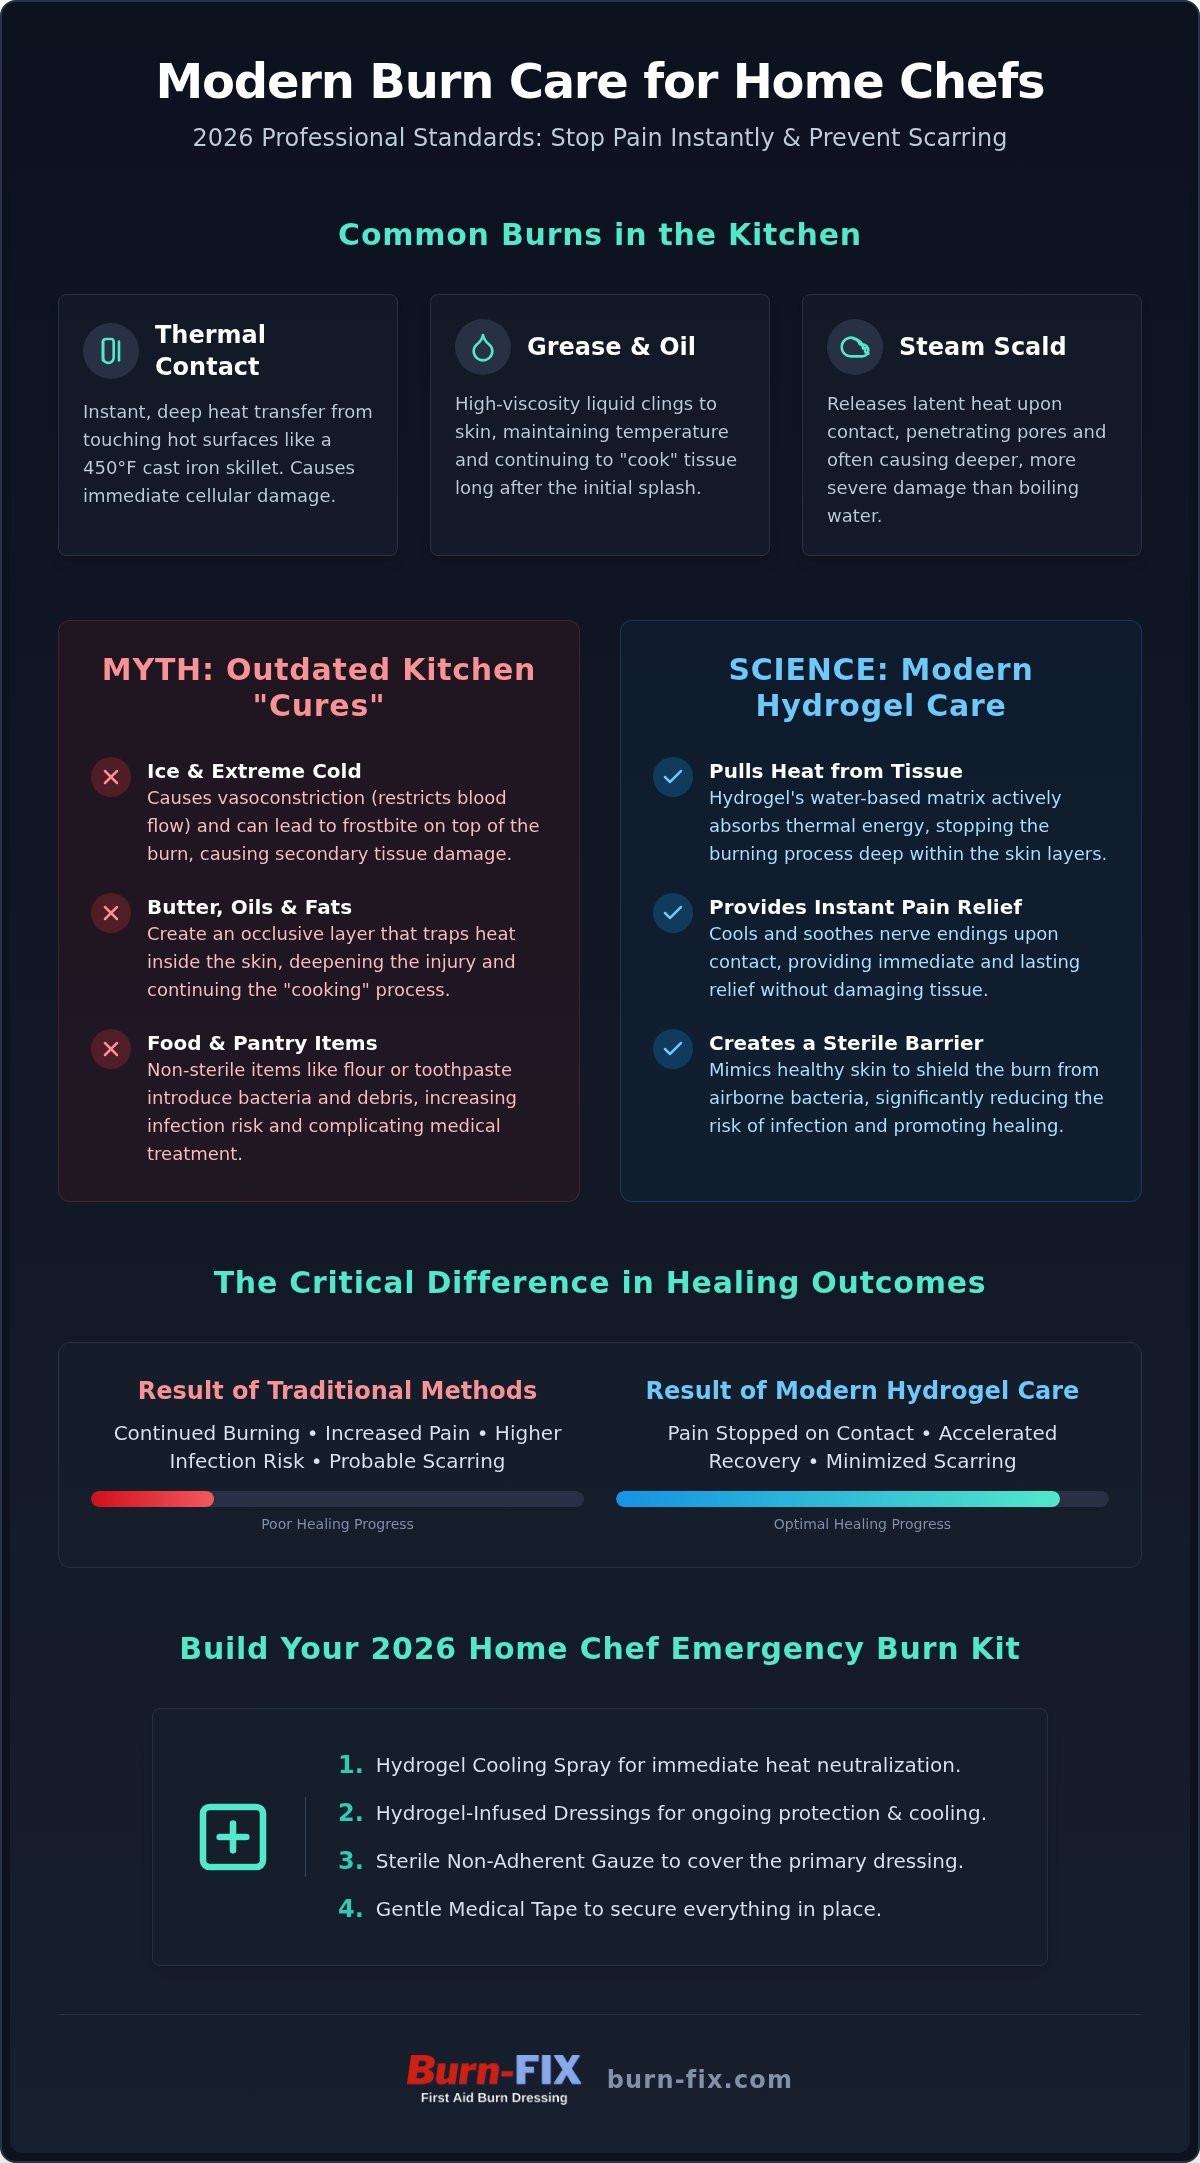
Thermal contact burns are perhaps the most common. Touching a cast iron skillet heated to 450 degrees causes immediate protein denaturation in the skin. The heat transfer is instantaneous. Your skin doesn't just get hot; it changes on a cellular level. Flash burns are equally sudden, often occurring during gas stove ignitions or grease flare-ups. These are typically superficial but can cover large areas of the face or hands in a single burst of flame.
The Physics of a Grease Burn
Grease is a unique and dangerous adversary. Unlike water, hot oil has a high viscosity that allows it to cling to the skin, effectively "cooking" the tissue long after the initial splash. This prolonged contact drives heat deeper into the dermis. Because oil doesn't evaporate, it maintains its temperature far longer than boiling water. You can find detailed protocols in our guide on first aid for stove burns. Rapid cooling is the only way to stop this "cooking" process. You must neutralize the heat immediately before it reaches the deeper layers of your skin and causes permanent damage.
Steam vs. Scalds: Identifying the Severity
Steam is often underestimated by even experienced cooks. While boiling water hits at 212 degrees Fahrenheit, steam carries latent heat that releases upon contact with your cooler skin, often causing deeper damage than a liquid splash. Understanding burn classifications is vital for your recovery. A first-degree burn usually presents as red, painful skin. A second-degree burn involves blistering and deeper nerve involvement, indicating the heat has moved past the surface.
When steam penetrates the pores, it can cause significant internal damage. If you experience widespread blistering or the pain doesn't subside with cool water, you're likely dealing with a second-degree injury. Our specialized first aid for steam burns explains why simple tap water often fails to pull enough heat from the tissue. Steam burns require more than just water because the heat is trapped within the skin layers. You need a solution that actively draws that thermal energy out to prevent the burn from "traveling" deeper into your hand.
Why Traditional Home Remedies Fail and What Science Recommends
When the pain hits, your first instinct is often to reach for the nearest cold substance in your pantry. It's a logical reaction to an emergency, but common "kitchen cures" can turn a minor injury into a long-term scar. Professional burn care for home chefs relies on evidence-based cooling, not pantry myths that aggravate the tissue. While your grandmother might have sworn by a stick of butter, modern dermatology tells a different story about how these substances interact with damaged skin.
The Danger of "Kitchen Cures"
Applying ice to a fresh burn is a frequent error that leads to secondary tissue damage. While it feels cold, the extreme temperature causes vasoconstriction, which shuts down blood flow to the area and can lead to frostbite on top of the burn. Butter and oils are even more problematic for the following reasons:
- Heat Trapping: Fats create an occlusive layer that seals heat inside the skin, continuing the "cooking" process.
- Bacterial Growth: Non-sterile dairy products provide a breeding ground for bacteria, significantly increasing infection risk.
- Debris Introduction: Substances like flour or toothpaste contain chemicals and particles that must be painfully scraped off by a doctor later.
For accurate first aid for minor burns, you need a solution that stabilizes the injury without causing further trauma. If you've already noticed fluid-filled pockets forming, follow our professional guide on treating burn blisters to ensure they heal safely without scarring.
How Hydrogel Mimics Healthy Skin
Hydrogel is a water-based matrix designed to mimic the skin's natural cooling and protective properties. Unlike tap water, which evaporates quickly and provides only surface relief, hydrogel absorbs heat from the deeper layers of the dermis. It provides an instant cooling sensation that immediately interrupts the pain signal sent to your brain. Effective thermoregulation in a burn requires a medium that actively transfers heat away from the wound while maintaining a sterile moisture barrier. This is why keeping BurnFix Hydrogel Burn Spray nearby is the most effective way to manage a kitchen crisis.
Standard tap water is often insufficient for the intense heat of a grease burn or a cast iron sear. Water runs off the skin and evaporates, leaving the deep tissue to continue smoldering. Hydrogel, however, stays in place and acts as a heat sink. It draws the thermal energy out of the skin and locks it within the gel matrix. This process doesn't just soothe; it stops the damage in its tracks and prevents the burn from progressing into deeper tissue layers.
The Home Chef’s Burn Care Toolkit: Sprays vs. Gels vs. Dressings
Having the right tools ready can mean the difference between a minor sting and a permanent scar. While tap water is a decent starting point, professional burn care for home chefs relies on specialized delivery systems designed to handle the intense heat of a modern kitchen. You need a toolkit that addresses the specific geometry of your injury, whether it's a pinpoint splatter on a knuckle or a wide scald on your forearm. Effective burn care for home chefs involves more than just a quick rinse under the faucet; it requires a strategic approach to heat extraction.
Hydrogel Spray: The First Line of Defense
Immediate cooling is your priority. BurnFix Hydrogel Burn Spray - 120ml provides a generous supply of cooling power that you can apply without ever touching the sensitive, damaged skin. This "no-touch" application is crucial during the first few seconds of an injury when even the lightest pressure feels agonizing. The spray creates a fine mist that covers irregular surfaces and hard-to-reach areas instantly. By using a burn relief spray, you stop the pain signal and begin the heat extraction process before you even turn off the stove. It's a fast, effective way to stabilize the wound and protect it from environmental contaminants.
4X4 Dressings: When to Use a Sterile Pad
Larger scalds or deep contact burns require a more robust intervention. Burn-FIX 4x4 First Aid Burn Gel Dressings are the professional choice for maximum heat extraction. These pads are saturated with medical-grade hydrogel, allowing them to act as a heat sink that pulls thermal energy out of the tissue for an extended period. Because they are non-adhesive, they won't stick to the wound bed, preventing the traumatic "skin-tearing" pain often associated with standard bandages. According to Mayo Clinic's first aid guide for burns, keeping a burn covered and moist is essential for preventing infection and promoting cellular repair. These dressings provide that sterile, moisture-retaining barrier while you focus on the next steps of your recovery.
For smaller, more precise injuries like a finger burn from a hot lid, BurnFix Burn Gel - 3.5g Per Packet offers the targeted relief you need. These individual packets are easy to store in a knife roll or kitchen drawer. Once the gel or dressing is applied, secure it with sterile gauze and wraps. This ensures the treatment stays in place while you finish your prep work or head to a medical professional. By matching the delivery method to the injury, you ensure the most efficient path to healing.
Step-by-Step: Managing a Kitchen Burn from Impact to Healing
The transition from injury to recovery depends on what you do in the first sixty seconds. Effective burn care for home chefs follows a logical progression designed to stop tissue damage before it becomes permanent. By moving quickly through these four steps, you can manage most minor kitchen accidents without professional intervention. Your goal is to neutralize the heat, stabilize the tissue, and protect the healing site.
- Step 1: Immediate Heat Neutralization. Stop the burn source instantly. Remove your hand from the skillet or the steam path and place the affected area under cool, running tap water for at least five minutes. Avoid ice, as extreme cold can shock the tissue and restrict blood flow.
- Step 2: Active Cooling. Once the surface heat is managed, apply a hydrogel spray or gel. While water handles surface temperature, hydrogel pulls heat from the deeper layers of the dermis. This step is what prevents the burn from "progressing" into deeper tissue.
- Step 3: Sterile Covering. Apply a non-stick, sterile dressing. Use a 4x4 hydrogel pad for larger areas or a smaller gel packet for localized spots. This protects the raw skin from bacteria and keeps the environment moist for faster cellular repair.
- Step 4: Monitoring. Watch the site over the next 48 hours. If you see spreading redness, yellow discharge, or feel a throbbing sensation, these are signs of infection that require medical attention.
Treating Finger and Hand Burns
Hand injuries are particularly challenging because of high-mobility areas like knuckles and fingertips. When you wrap a finger, don't pull the gauze too tight; you need to maintain circulation while allowing for natural swelling. For a detailed breakdown of managing these specific injuries, see our first aid for finger burns. Using a flexible hydrogel dressing allows you to maintain some mobility so you can finish your meal prep without a bulky, restrictive bandage getting in the way.
When to Step Away from the Stove
Not every injury can be handled at the kitchen island. You should seek emergency care if the burn is larger than three inches in diameter or covers an area larger than the injured person's palm. This "Three-Inch Rule" is a standard safety threshold for home treatment. Additionally, any burn on the face, genitals, or over a major joint requires professional evaluation. If a grease fire was involved, watch for signs of shock or smoke inhalation, such as dizziness, wheezing, or confusion. For total peace of mind during any kitchen crisis, ensure you have a BurnFix Burn Kit within arm's reach of your stove.
Building Your 2026 Home Chef Emergency Burn Kit
Preparation is the silent partner of every great meal. While you likely have a dedicated drawer for your sharpest knives and high-quality spices, a professional-grade station for burn care for home chefs is just as vital. You shouldn't be hunting through a cluttered bathroom cabinet while your hand is throbbing from a splash of hot oil. A dedicated kitchen burn station ensures that relief is always seconds away; it keeps you in control when a minor crisis occurs.
A well-stocked kit must prioritize immediate heat extraction and sterile protection. Your 2026 inventory should include these essentials:
- BurnFix Hydrogel Burn Spray - 120ml: This is your primary tool for rapid, no-touch cooling on larger areas or sensitive skin.
- Burn-FIX 4x4 First Aid Burn Gel Dressing: These sterile pads are necessary for managing deep contact burns or significant scalds that require sustained cooling.
- BurnFix Burn Gel - 3.5g Per Packet: Keep several of these individual packets for precision treatment on fingertips and knuckles.
Organization matters as much as the contents themselves. Store your kit in a cool, dry place that's easily accessible but away from the direct heat of the stove or oven. High temperatures can degrade the sterile seals and hydrogel quality over time. Make it a habit to check expiration dates annually. Sterile dressings lose their efficacy if the packaging is compromised; keeping your supplies current ensures you're always ready for the unexpected.
The Burn-Fix Solution for Cooks
The easiest way to secure your kitchen is with a pre-configured kitchen safety first aid kit. We recommend the BurnFix Burn Kit because it consolidates all professional-grade hydrogel formats into one portable station. If you enjoy outdoor cooking, the individual BurnFix Burn Gel packets are particularly useful. They fit easily into an apron pocket or a grilling caddy, providing on-the-go burn care for home chefs who work with the high-intensity heat of charcoal or propane flames.
Grilling and Outdoor Cooking Safety
Outdoor cooking environments present unique challenges, from flare-ups to heavy, hot metal grates. The rules of heat neutralization remain the same, but the risk of secondary injuries increases. For instance, handling rough grill tools or slipping on a deck can lead to abrasions that require immediate attention. You can find specific protocols in our guide on first aid for friction burns. Whether you're at the stove or the smoker, your priority is preserving your skin and your passion for cooking. Protect your hands and your craft with Burn-Fix.
Secure Your Kitchen Against the Unexpected
You now have the knowledge to move past dangerous pantry myths and embrace professional medical standards. By ditching the butter and ice in favor of doctor-recommended hydrogel technology, you're choosing a path of rapid cooling and minimal scarring. Effective burn care for home chefs means acting with confidence when a splash of oil or a cloud of steam threatens your comfort. You've learned that neutralizing heat instantly and applying a moisture-retaining barrier are the most critical steps to protecting your skin's health.
Don't wait for the next accident to realize your first aid kit is lacking. High-quality, non-stick sterile dressings ensure a painless recovery, while hydrogel sprays provide instant relief for 1st and 2nd-degree burns. Equip your kitchen with the BurnFix Burn Kit today to ensure you're always prepared. You've worked hard to master your craft; now you can protect your hands with the same level of expertise. Keep cooking with peace of mind.
Frequently Asked Questions
Is it better to put ice or butter on a kitchen burn?
Neither ice nor butter is appropriate for kitchen burns. Ice causes vasoconstriction, which restricts blood flow and can lead to frostbite on top of the heat injury. Butter is even more dangerous because fats create an occlusive layer that traps heat inside the skin. It also introduces bacteria into the wound. Instead, use cool running water followed by a dedicated hydrogel solution to stabilize the tissue and stop the pain.
How do I stop a grease burn from blistering?
Stop the "cooking" process immediately by cooling the area with running water for five minutes. Grease clings to the skin and continues to damage tissue long after the initial splash. After the water rinse, apply a hydrogel dressing to actively pull heat from the deeper dermis. This rapid heat extraction is the most effective way to prevent the fluid buildup that leads to painful blisters.
Can I use hydrogel spray on an open burn wound?
You can safely use Burn-Fix hydrogel products on 1st and 2nd-degree burns that have broken skin. These medical-grade solutions are sterile and designed to provide a moisture-retaining barrier that mimics healthy skin. The gel prevents the wound from drying out, which is essential for cellular repair. However, if you suspect a 3rd-degree burn, which often looks charred or white and lacks sensation, you must seek emergency medical care immediately.
How often should I change a burn dressing in the kitchen?
Change your burn dressing at least once every 24 hours to ensure the wound stays clean and moist. In a busy kitchen, dressings often become wet or soiled from food prep, which can introduce bacteria. If the bandage becomes loose or dirty, replace it immediately with a fresh Burn-FIX 4x4 First Aid Burn Gel Dressing. Regular monitoring allows you to check for signs of infection while maintaining a sterile environment for healing.
What is the difference between a first and second-degree kitchen burn?
A first-degree burn affects only the outer layer of skin, causing redness and mild pain similar to a sunburn. A second-degree burn goes deeper into the dermis, resulting in intense pain, swelling, and the formation of blisters. Identifying the depth of the injury is a vital part of burn care for home chefs. While 1st-degree burns heal quickly, 2nd-degree injuries require more attentive care to prevent scarring and infection.
Should I pop a burn blister if it happens while cooking?
You should never pop a burn blister that occurs while cooking. The blister acts as a natural, sterile "bandage" that protects the raw skin underneath from infection. Breaking the skin exposes the wound to kitchen contaminants and slows down the recovery process. If a blister pops on its own, clean the area gently with mild soap and water, then cover it with a sterile hydrogel dressing to maintain moisture and protection.
How long does a minor stove burn take to heal?
A minor stove burn typically takes between one and two weeks to heal completely. The exact duration depends on the depth of the injury and how quickly you neutralized the heat. Using professional-grade hydrogel technology can accelerate this timeline by keeping the wound bed moist and protected from external stressors. If the area remains painful or hasn't shown significant improvement after seven days, consult a healthcare professional to ensure no underlying infection exists.
When should a home chef see a doctor for a burn?
Seek medical attention if the burn is larger than three inches or involves the face, hands, feet, or genitals. You should also see a doctor if the pain becomes worse over time or if you notice signs of infection like spreading redness, pus, or fever. For any injury that appears deep, charred, or leathery, go to the emergency room immediately. Proper burn care for home chefs involves knowing when an injury exceeds home treatment capabilities.


